Contents:
- Why Saving Flower Seeds Makes Biological and Financial Sense
- Open-Pollinated vs. Hybrid: The Most Important Distinction in Seed Saving
- Understanding Flower Seed Anatomy and Maturity
- Seed Maturity by Flower Type
- How to Harvest Flower Seeds: Tools, Techniques, and Timing
- Equipment You Actually Need
- The Harvest Process Step by Step
- Wet Processing for Certain Flower Types
- Cleaning and Drying Seeds: The Critical Bottleneck
- The Paper Drying Method
- Separating Seeds from Chaff
- Storing Flower Seeds: How to Maintain Viability Through Winter and Beyond
- Storage Containers and Materials
- Expected Viability by Species
- Conducting a Germination Test Before Planting
- Starting Flower Seeds Indoors: A Practical Approach for Small Spaces
- Timing: The Seed Starting Calendar
- Small-Space Seed Starting Setup
- The Sowing Process
- Light Requirements After Germination
- Transplanting and Hardening Off: Getting Seedlings from Indoors to Outside
- The Hardening Off Process
- Transplanting into Containers
- Troubleshooting Common Seed Saving and Starting Problems
- Poor Germination Rates
- Damping Off
- Leggy Seedlings
- Cross-Pollination and Variety Purity
- Building a Small-Space Seed Library
- Labeling Best Practices
- Seed Swapping and Community Resources
- A Practical Flower Seed Saving Guide for Apartment Gardeners: Season by Season
- Winter (December–February)
- Spring (March–May)
- Summer (June–August)
- Fall (September–November)
- Frequently Asked Questions About Flower Seed Saving
- How do I know if my saved flower seeds are still viable?
- Can I save seeds from any flower in my garden?
- How long can flower seeds be stored?
- What’s the best way to store flower seeds in a small apartment without a basement?
- Do saved seeds need any special treatment before planting?
- Take Your Seed Saving Further
You bought a packet of seeds last spring, grew something beautiful, and now you’re watching the spent blooms dry on the stem — wondering if you could somehow capture that magic again. Or maybe you’ve tried saving seeds before and ended up with a moldy jar of disappointment. Either way, you’re not alone. Seed saving is one of those skills that looks deceptively simple from the outside but rewards anyone who takes the time to understand what’s actually happening inside those tiny, miraculous structures. This flower seed saving guide covers everything: which flowers are worth saving from, how to harvest and dry seeds properly, how to store them through winter without losing viability, and how to start them successfully — even if your “garden” is a south-facing windowsill and a few square feet of balcony.
Why Saving Flower Seeds Makes Biological and Financial Sense
A single mature zinnia flower head contains between 50 and 200 seeds. A packet of zinnia seeds at a garden center runs $3 to $5 for 50 seeds. If you save seeds from just five flower heads, you’ve effectively generated $30 to $50 worth of planting material for next season — at zero cost beyond a few paper envelopes and 20 minutes of your time.
Beyond economics, seed saving connects you to a plant’s life cycle in a way that purchasing seeds never does. You observe how a flower transitions from bloom to seed-producing structure. You learn to read the plant’s signals — the shift in color, the drying of petals, the hardening of seed cases. This observational fluency makes you a better gardener across the board.
There’s also a conservation dimension. Many heritage and open-pollinated flower varieties are maintained almost entirely by home gardeners who save and share seeds. Commercial seed companies prioritize varieties with long shelf lives and uniform appearance. The sprawling, fragrant, slightly chaotic heirloom sweet pea your grandmother grew? It exists because someone kept saving it.
Open-Pollinated vs. Hybrid: The Most Important Distinction in Seed Saving
This is where many beginners make a costly mistake. Not all flower seeds are worth saving — specifically, seeds from hybrid (F1) varieties will not reliably reproduce the parent plant. F1 hybrids are the result of crossing two genetically distinct parent lines to produce offspring with specific traits: uniform color, disease resistance, larger blooms. Those traits are not encoded in a stable, heritable way. Seeds saved from an F1 hybrid will segregate in the next generation, producing plants that revert toward one parent line or another — often inferior in appearance.
Open-pollinated (OP) varieties, by contrast, are genetically stable across generations. Pollinated by insects, wind, or hand, they produce offspring that closely resemble the parent plant. Heirloom varieties are a subset of open-pollinated varieties with a documented history, typically predating 1951 (the year hybrid seeds became commercially dominant).
The practical rule: look for “OP,” “open-pollinated,” or “heirloom” on seed packets. Avoid saving from anything labeled “F1 hybrid.” Common open-pollinated flowers ideal for seed saving include zinnias, cosmos, bachelor’s button (centaurea), larkspur, marigolds, nigella, sunflowers, and sweet peas.
Common confusion point: Many gardeners confuse “non-GMO” with “open-pollinated.” These are not the same thing. A seed can be non-GMO and still be an F1 hybrid — meaning it won’t breed true. Non-GMO simply means no genetic modification was performed in a laboratory. Always check for the OP or heirloom designation separately.
Understanding Flower Seed Anatomy and Maturity
A seed is not just a dormant embryo waiting for water. It’s a complete biological package: an embryo, a nutrient supply (endosperm or cotyledons), and a protective seed coat. The seed coat’s integrity is critical to storage longevity. Seeds harvested before full maturity have underdeveloped coats, incomplete nutrient reserves, and dramatically lower germination rates.
Full seed maturity occurs after the flower’s fertilization and a period of development that typically lasts 4 to 8 weeks past peak bloom, depending on species. The plant signals maturity through predictable physical changes:
- Seed heads dry and turn brown or tan — green seed heads are almost always immature.
- Seeds darken — most mature seeds are brown, black, or tan, not white or pale green.
- Seed cases open or crack — nigella pods split; poppy capsules develop holes at the top; cosmos achenes pull free easily.
- Seeds rattle inside the pod — a reliable indicator for many species including marigolds and nigella.
Dr. Patricia Wyndham, a horticulturist with 22 years of experience at the Chicago Botanic Garden, puts it plainly: “The single biggest mistake home gardeners make is harvesting too early. A flower that looks ‘done’ to the human eye is often still three weeks away from producing viable seed. Let the plant finish its job.”
Seed Maturity by Flower Type
Different flower structures require different timing cues. Here’s a working reference for common garden flowers:
- Zinnias: Wait until the base of the flower head is fully dry and the petals are papery. Pull the arrowhead-shaped seeds from the dried head. Germination rate from fully mature seeds: 70–85%.
- Cosmos: The long, thin achenes are ready when they turn dark brown and pull cleanly from the receptacle. Don’t wait too long — they self-sow readily and will drop before you harvest.
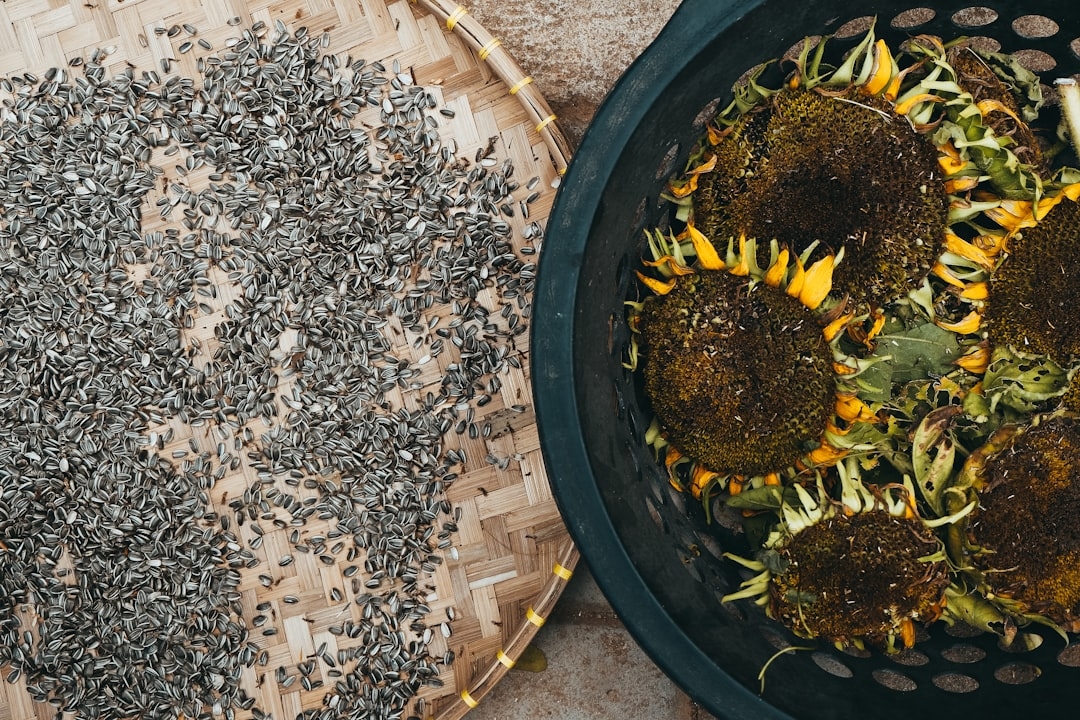
- Sunflowers: Allow the back of the head to turn fully yellow-brown. Press a seed — if it’s hard and the hull is firm, it’s ready. Cover ripening heads with a paper bag to prevent bird loss.
- Sweet Peas: The pods turn from green to tan and feel papery. Harvest before they twist and split open, ejecting seeds up to several feet away.
- Marigolds: Dry the entire flower head on the plant or cut and bring indoors to finish drying. The quill-shaped seeds pull easily from the dry head.
- Nigella (Love-in-a-Mist): The inflated pods turn from green to parchment-colored. Shake gently — you’ll hear the small black seeds rattling inside.
How to Harvest Flower Seeds: Tools, Techniques, and Timing
Harvesting is low-tech. You don’t need specialized equipment. What you need is correct timing, dry weather, and the right containers to prevent loss.
Equipment You Actually Need
Total startup cost for a basic seed-saving kit: under $15.
- Small paper envelopes or coin envelopes ($4–6 for 50 envelopes) — paper breathes and prevents condensation; never use sealed plastic bags for freshly harvested seeds.
- A fine mesh strainer or flour sifter (repurpose one from your kitchen) — for separating seeds from chaff.
- Small paper plates or sheets of parchment paper — for drying seeds flat.
- A permanent marker — label everything immediately. Memory is unreliable.
- Optional: a small fan — gentle airflow speeds drying without heat damage.
The Harvest Process Step by Step
- Choose a dry day. Harvest after at least 48 hours without rain. Moisture on seeds or seed heads introduces mold during drying.
- Select your best plants. Save from the healthiest, most vigorous specimens with the traits you want to perpetuate — not the convenient ones closest to the door.
- Cut the seed head or pod into a paper bag or envelope. Hold the container beneath the seed head before cutting to catch any that fall immediately.
- Label immediately. Write species, variety name, color, and harvest date before you set the envelope down. Unlabeled seeds are a problem every experienced gardener has experienced exactly once.
- Bring indoors for finishing. Even seeds that appear dry on the plant benefit from an additional 1–3 weeks of indoor drying in a well-ventilated space away from direct sunlight.
Wet Processing for Certain Flower Types
A small number of flowers — particularly those with fleshy berries or fruit-enclosed seeds like certain species tulips and some primulas — benefit from wet processing. Place the fleshy material in water, allow viable seeds to sink (non-viable seeds float), pour off the water and floaters, then rinse the remaining seeds and spread them on a screen to dry. This method is borrowed from vegetable seed saving and applies to relatively few ornamental flowers, but it’s worth knowing.
Cleaning and Drying Seeds: The Critical Bottleneck
Improper drying is the primary cause of failed seed storage. Seeds that go into storage with residual moisture will mold, ferment, or suffer cellular damage during freezing temperatures. The target moisture content for long-term seed storage is below 8%. You can’t measure this without laboratory equipment, but you can achieve it reliably through proper drying technique.
The Paper Drying Method
Spread seeds in a single layer on a sheet of white printer paper or parchment. Avoid newspaper — the ink can transfer and some seeds may stick. Place in a room with low humidity (below 50% relative humidity is ideal), good airflow, and no direct sun. Direct sunlight can degrade seed viability. A kitchen counter away from the stove works well. Leave seeds to dry for a minimum of two weeks for small seeds, three to four weeks for larger seeds like sunflowers or sweet peas.
The “snap test” for readiness: a properly dried seed should snap cleanly when bent rather than bending flexibly. This works reliably for larger seeds. For very small seeds (like lobelia or snapdragon), rub them between your fingers — they should feel completely dry, not waxy or cool to the touch.
Separating Seeds from Chaff
Chaff — the dried plant material surrounding seeds — traps moisture and should be removed before storage. For most flower seeds, this is simple:
- Threshing: Rub seed heads between your palms over a bowl or paper. The seeds release; the chaff is lighter.
- Winnowing: Gently blow across the bowl or pour seeds from one container to another in front of a slow fan. Chaff blows away; heavier seeds fall straight.
- Sieving: For mixed debris, use two different mesh sizes — one to catch large debris, one to catch seeds while fine chaff passes through.
Perfection isn’t required. A small amount of chaff in storage is harmless. The goal is to remove the bulk of organic material that could trap moisture.
Storing Flower Seeds: How to Maintain Viability Through Winter and Beyond
Seed viability degrades predictably with heat and humidity. The relationship is captured in a useful rule of thumb called James’ Rule: the sum of the storage temperature (in Fahrenheit) and the relative humidity percentage should equal no more than 100 for optimal long-term storage. At 70°F and 50% humidity, that sum is 120 — too high for multi-year storage.
For apartment dwellers without a root cellar or basement, the refrigerator is your best friend. The typical refrigerator runs at 35–38°F and 30–40% relative humidity — a sum of 65–78, well within the safe range. Seeds stored this way maintain viability two to three times longer than seeds kept at room temperature.
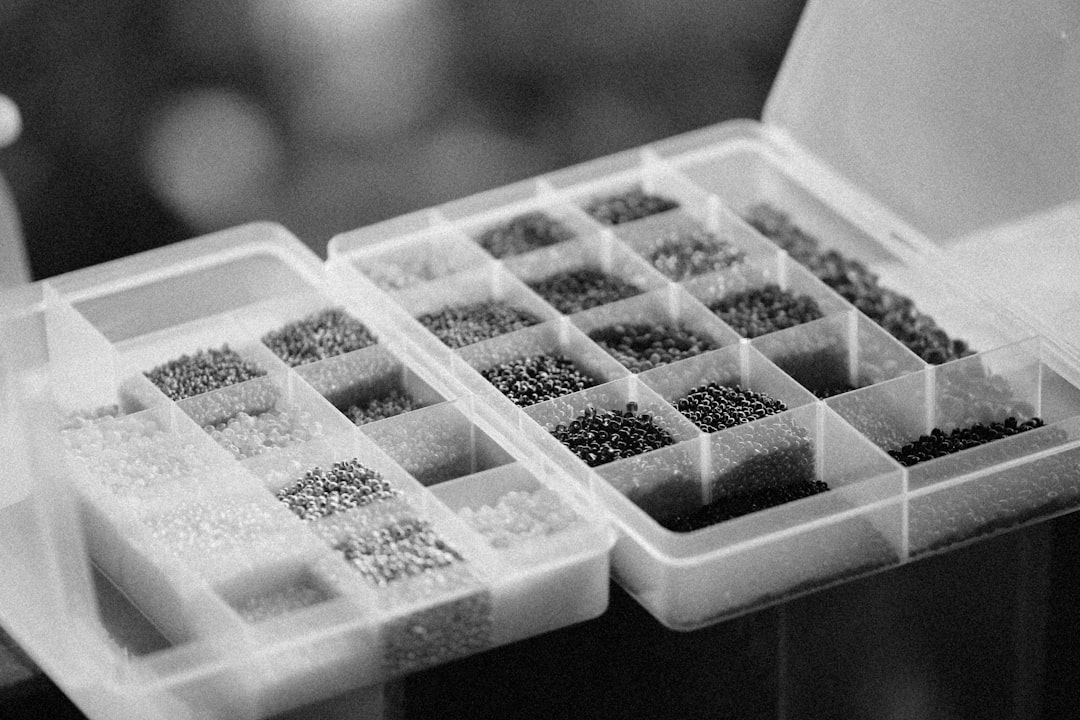
Storage Containers and Materials
Budget storage setup (under $10 total):
- Paper coin envelopes for individual varieties ($4 for 50)
- A sealed glass jar or airtight plastic container to hold the envelopes ($2–4, or repurpose a mason jar)
- Silica gel desiccant packets ($3–5 for a pack of 10) — place 1–2 inside the outer container to absorb any residual moisture
The layered system — individual paper envelopes inside an airtight outer container with desiccant — is used by seed libraries and professional seed banks for exactly the same reason: it combines breathable inner packaging (preventing condensation on seeds) with a moisture-controlled outer environment.
Avoid: sealed plastic bags directly touching seeds (condensation risk), wooden boxes (absorb and release moisture), and storage near appliances that generate heat or humidity, including the top of a refrigerator, above a stove, or near a dishwasher.
Expected Viability by Species
Seed longevity varies significantly by species. Under good storage conditions (refrigerator, desiccant):
- Short-lived (1–2 years): Delphinium, larkspur, verbena, onion flowers
- Medium-lived (3–5 years): Zinnia, cosmos, marigold, sweet pea, bachelor’s button
- Long-lived (5+ years): Sunflower, nigella, poppy, morning glory, nasturtium
These figures assume properly dried, well-stored seeds. Room-temperature storage under humid conditions can cut these numbers in half or worse.
Conducting a Germination Test Before Planting
Before committing an entire season to seeds of uncertain age, run a germination test in January or February. Place 10 seeds between two damp paper towels, seal in a zip-lock bag, and keep at 65–70°F (a warm spot indoors). Check at 5, 7, and 10 days. Count germinated seeds to get your germination percentage. If 7 of 10 germinate, you have 70% germination — acceptable for most purposes. Below 50%, plan to sow more densely or source fresh seeds.
Starting Flower Seeds Indoors: A Practical Approach for Small Spaces
Starting seeds indoors extends your growing season and gives small-space gardeners maximum control over plant development. For apartment growers, this typically means a windowsill setup or a compact grow light arrangement — both are genuinely effective if set up correctly.
Timing: The Seed Starting Calendar
Most flower seeds are started 6–10 weeks before the last expected frost date for your area. In the US, last frost dates vary widely:
- USDA Zone 5 (Chicago, Denver): Last frost around May 15; start seeds indoors early March
- USDA Zone 7 (Washington DC, Charlotte): Last frost around April 15; start seeds indoors mid-February
- USDA Zone 9 (Los Angeles, Houston): Last frost around February 15; start seeds indoors late December to early January
The Farmer’s Almanac frost date tool (available online, free) gives your specific zip code’s average last frost date. Use that as your anchor date and count backward based on the seed packet’s recommended lead time.
Small-Space Seed Starting Setup
Compact indoor setup cost estimate: $25–60 for a first-time setup (reusable for many seasons):
- Seed starting mix: $6–10 for a small bag. Do not use garden soil or standard potting mix — they’re too dense and may harbor pathogens. Seed starting mix is sterile and fine-textured.
- Small cell trays or repurposed containers: $5–10, or free if reusing yogurt cups, egg cartons (the cardboard kind), or toilet paper tubes. Ensure drainage holes.
- Humidity dome or plastic wrap: $3–8, or free with plastic wrap. Maintains surface moisture during germination.
- Grow light (optional but recommended): $15–35 for a basic LED panel. A south-facing window works for some species but delivers inconsistent light, especially in northern zones during February and March.
The Sowing Process
- Moisten the seed starting mix before filling containers — dry mix is hydrophobic and water will run off. Mix should feel like a wrung-out sponge: uniformly damp, not dripping.
- Fill cells to within ¼ inch of the top. Firm gently but don’t compact.
- Sow at the correct depth. A reliable rule: sow seeds at a depth equal to twice their diameter. Tiny seeds like snapdragon and lobelia are pressed onto the surface and not covered — they require light to germinate.
- Mist the surface lightly with a spray bottle. Do not pour water over small seeds — it displaces them.
- Cover with a humidity dome or plastic wrap and place in a warm location. Bottom heat (65–75°F) dramatically speeds germination. A heat mat set to 70°F is the single most effective tool for improving germination rates — it can cut germination time nearly in half for heat-loving species like zinnias and marigolds.
- Check daily. Remove the dome as soon as you see the first sprouts emerging. Leaving the dome on after germination invites damping off, a fungal condition that collapses seedlings at the soil line.
Light Requirements After Germination
Newly germinated seedlings need 14–16 hours of bright light per day. A windowsill in winter rarely delivers this, even south-facing. Without adequate light, seedlings become etiolated — stretched, pale, and weak — as they reach toward the light source. A basic LED grow light positioned 2–4 inches above the seedling tops, on a timer set for 16 hours, solves this entirely and costs roughly $0.50 per month to run.
Transplanting and Hardening Off: Getting Seedlings from Indoors to Outside
Seedlings grown indoors are physiologically unprepared for outdoor conditions: direct UV radiation, wind, temperature fluctuation, and lower humidity. Transplanting them directly outdoors causes transplant shock and, in some cases, plant death. Hardening off — a 7–14 day acclimation process — bridges this gap.
The Hardening Off Process
- Days 1–3: Place seedlings outside in a sheltered, shaded location for 1–2 hours per day. Bring them back in before evening temperatures drop below 50°F for frost-tender species.
- Days 4–7: Increase outdoor time to 4–6 hours. Introduce some direct morning sun.
- Days 8–14: Extend to full days outdoors, including afternoon sun. Begin leaving them out overnight when nighttime temperatures are reliably above 45°F.
For apartment balcony growers, this process works perfectly. A sheltered balcony that receives indirect light is an ideal hardening-off environment. Watch for excessive wind, which desiccates seedlings faster than sun.
Transplanting into Containers
For those growing in containers rather than ground soil, pot size matters more than most gardeners realize. Zinnias and marigolds need a minimum 12-inch diameter pot per plant to develop properly. Cosmos can reach 4 feet tall and need either staking or a very heavy pot to avoid toppling. Sweet peas need a trellis and a long, deep container — at least 12 inches deep — for their root systems.
Use a quality potting mix, not seed starting mix, for final containers. Potting mix contains nutrients and better drainage structure for mature plants. Add slow-release granular fertilizer at planting time for container plants, which lose nutrients through frequent watering faster than in-ground plants.
Troubleshooting Common Seed Saving and Starting Problems
Poor Germination Rates
If fewer than 50% of your saved seeds germinate, the most likely causes are: seeds harvested too early (most common), improper drying before storage, storage under warm or humid conditions, or seeds that have simply aged past their viable window. Run a germination test as described above before assuming the seeds are a total loss — sometimes sowing more densely is all that’s needed.
Damping Off
Damping off is a fungal condition caused by species of Pythium, Rhizoctonia, and Fusarium that causes seedlings to collapse at the soil line, usually within a week of germination. Prevention is straightforward: use sterile seed starting mix (never garden soil), ensure good airflow after germination, water from below rather than above, and remove humidity domes promptly. If damping off appears, remove affected seedlings immediately, reduce watering, and increase airflow.
Leggy Seedlings
Etiolated, stretched seedlings are almost always a light problem. The fix is more light, closer to the seedlings. A grow light at the correct distance (2–4 inches above the canopy for most LEDs) solves this. If using a windowsill, rotating trays 180 degrees every day keeps growth more even, but this is a partial solution at best in low-light conditions.
Cross-Pollination and Variety Purity
If you’re growing multiple varieties of the same species in close proximity — say, red, orange, and yellow zinnias together — the seeds you save will reflect cross-pollination between varieties. The plants they produce may not match the parent color. This is not harmful to the plant, but if color consistency matters to you, either grow only one variety per species or practice isolation: separate varieties of the same species by at least 300 feet (difficult in an apartment context) or use physical barriers like insect netting over the blooms during pollination.
For most apartment gardeners, embracing the variation is the pragmatic choice. Saved seeds from mixed zinnia plantings often produce beautiful, unexpected color combinations.
Building a Small-Space Seed Library
A personal seed library — an organized collection of your saved seeds — is one of the most satisfying projects a small-space gardener can undertake. It requires almost no physical space. A shoebox holds 50 labeled envelopes comfortably. A recipe card box with divider tabs organized by plant family or bloom season is even better.
Labeling Best Practices
Each seed envelope should record at minimum: common name, botanical name (if known), variety name, flower color, and harvest year. Adding notes on plant height, days to bloom, and performance observations turns your seed library into a personal plant database. Over several seasons, this becomes an invaluable record of what performs well in your specific microclimate.
Seed Swapping and Community Resources
Seed swaps — local events and online communities where gardeners exchange saved seeds — are an excellent source of rare, open-pollinated varieties that never appear in commercial catalogs. The Seed Savers Exchange (seedsavers.org) maintains a public catalog of thousands of heirloom varieties and operates a network of member-gardeners who grow and share seeds annually. Many public libraries now host “seed libraries” where borrowers can check out seeds, grow them, and return seeds at the end of the season — free of charge.
For apartment gardeners, seed swaps offer particular value: you can acquire a much wider range of varieties than any single small-space garden could produce, without the cost of purchasing commercially.
A Practical Flower Seed Saving Guide for Apartment Gardeners: Season by Season
Seed saving, growing, and starting form a continuous loop rather than a linear process. Here’s how it maps across a full calendar year for a typical northern US apartment gardener (Zones 5–6):
Winter (December–February)
- Conduct germination tests on saved seeds from the previous season
- Organize and update your seed library; discard seeds past their viable window
- Order any open-pollinated varieties you want to add to your collection
- Start slow-growing species indoors in late February (larkspur, sweet peas)
Spring (March–May)
- Begin indoor seed starting 6–8 weeks before last frost (March for Zone 5)
- Harden off seedlings in late April through May
- Transplant to containers or outdoor beds after last frost
- Direct sow cold-tolerant species (bachelor’s button, larkspur, nigella) outdoors 2–4 weeks before last frost
Summer (June–August)
- Monitor flowering plants for seed development; note which plants show the traits you want to save
- Mark selected seed plants with a ribbon or tag so they aren’t deadheaded
- Begin harvesting as seed heads mature (typically 4–8 weeks after peak bloom)
Fall (September–November)
- Complete harvesting before first frost; bring in any seed heads that haven’t fully dried
- Finish indoor drying; clean and process all seeds
- Label and store all seeds in envelopes with desiccant in the refrigerator
- Record notes on performance, yield, and any observations from the season
Frequently Asked Questions About Flower Seed Saving
How do I know if my saved flower seeds are still viable?
Conduct a simple germination test: place 10 seeds between two damp paper towels, seal in a plastic bag, and keep at room temperature (65–70°F) for 7–10 days. Count how many germinate. A rate of 70% or above is acceptable; below 50% suggests the seeds have lost significant viability and you should sow more densely or source fresh seeds.
Can I save seeds from any flower in my garden?
Only from open-pollinated or heirloom varieties. Seeds saved from F1 hybrid plants will not reproduce true to the parent and typically produce inferior offspring. Look for “OP,” “open-pollinated,” or “heirloom” on the original seed packet. If the packet says “F1 hybrid,” do not save seeds from that plant for replanting.
How long can flower seeds be stored?
Storage life depends on species and conditions. Under optimal storage — sealed container with desiccant in a refrigerator at 35–40°F — most flower seeds remain viable for 3–5 years. Some species (poppies, morning glories, sunflowers) can last 5–7 years. Short-lived species like delphinium and larkspur should be used within 1–2 years even under ideal conditions.
What’s the best way to store flower seeds in a small apartment without a basement?
Use a layered system: individual paper envelopes inside a sealed glass jar or airtight container with 1–2 silica gel desiccant packets. Store the sealed container in the main body of your refrigerator (not the door, which fluctuates in temperature). This approach maintains seeds at 35–40°F and low humidity — conditions comparable to a professional seed bank.
Do saved seeds need any special treatment before planting?
Most flower seeds can be planted directly from storage. However, some species with hard seed coats — morning glories, sweet peas, nasturtiums — germinate faster with scarification (gently nicking or sanding the seed coat) or soaking in room-temperature water for 12–24 hours before sowing. Some cold-climate perennial seeds require stratification — a period of moist cold exposure (4–8 weeks at 35–40°F) that mimics winter — before they will germinate. Seed packets and reputable seed suppliers will specify if these treatments are needed.
Take Your Seed Saving Further
Saving your first successful batch of seeds — watching the dried envelope in your refrigerator transform into living plants the following spring — changes how you think about gardening permanently. It shifts your perspective from consumer to cultivator, from seasonal to cyclical.
The next step beyond personal use is participation. Seed libraries, local horticultural societies, and online communities like the Seed Savers Exchange network connect you with gardeners who have been refining and preserving varieties for decades. Contributing your saved seeds to these networks — even in small quantities — adds your microclimate’s selection pressure to the ongoing story of each variety. That’s not a small thing.
For the apartment gardener working with limited space and budget, this flower seed saving guide represents a complete starting framework. A $15 investment in envelopes, desiccant, and a mason jar — combined with careful observation and timing — can sustain a beautiful container garden indefinitely, at nearly zero ongoing cost. The seeds you save this fall are next spring’s garden, already waiting.
+ There are no comments
Add yours