Contents:
- What Is Hydroponic Flower Growing — and Why It Works So Well
- The Core Advantage: Environment Control
- Choosing the Right Hydroponic System for Flowers
- Deep Water Culture (DWC)
- Nutrient Film Technique (NFT)
- Kratky Method
- Ebb and Flow (Flood and Drain)
- Best Flowers to Grow Hydroponically as a Beginner
- Top Beginner-Friendly Hydroponic Flowers
- Flowers to Avoid Initially
- Setting Up Your First Hydroponic Flower System
- Equipment You’ll Need
- Step-by-Step Setup
- pH and EC: The Two Numbers That Run Everything
- Lighting for Hydroponic Flowers: What Actually Works
- Light Intensity and Spectrum
- Photoperiod: Triggering Bloom with Light Schedules
- Nutrients, Water Quality, and Feeding Schedules
- The Two-Stage Feeding Approach
- Water Temperature and Reservoir Maintenance
- A Seasonal Timeline for Hydroponic Flower Growing
- Regional Considerations: How Location Shapes Your Setup
- Northeast (USDA Zones 4–6)
- Southeast and Gulf Coast (USDA Zones 7–10)
- West Coast (USDA Zones 8–11)
- Mountain West and Plains (USDA Zones 4–7)
- Common Problems and How to Fix Them
- Yellowing Leaves
- Root Rot (Pythium)
- Algae Growth
- Stunted or No Flowering
- Scaling Up: From One Plant to a Productive Home Setup
- Frequently Asked Questions: Hydroponic Flower Growing for Beginners
- What is the easiest flower to grow hydroponically for a beginner?
- How much does it cost to start a hydroponic flower garden?
- Do hydroponic flowers smell and look the same as soil-grown flowers?
- Can you grow hydroponic flowers without a grow light?
- How often do you change the water in a hydroponic flower system?
- Your First Harvest and What Comes Next
You don’t need soil, a backyard, or even good weather to grow the most stunning flowers of your life. Hydroponics — growing plants in nutrient-rich water instead of dirt — has quietly revolutionized home gardening, and flowers are among the biggest beneficiaries. This hydroponic flowers beginners guide will take you from zero experience to confidently growing blooms year-round, indoors, with total control over the outcome.
Gardeners who switch to hydroponics often report being shocked. Not by the complexity, but by how fast things grow. Hydroponic plants can grow 30–50% faster than their soil-grown counterparts, according to data from the University of Nevada’s Cooperative Extension, because roots have direct, unobstructed access to oxygen and nutrients. For flowers specifically, that means earlier blooms, longer vase life, and the kind of color saturation you usually only see in florist shop arrangements.
This guide covers everything: choosing your first system, picking the right flowers, managing nutrients, troubleshooting problems, and scaling up when you get hooked. And you will get hooked.
What Is Hydroponic Flower Growing — and Why It Works So Well
Traditional gardening relies on soil as an intermediary — a medium that holds water, nutrients, and beneficial microbes, then slowly delivers them to roots. Hydroponics cuts out the middleman. Roots sit directly in or near a nutrient solution, absorbing exactly what the plant needs, when it needs it.
For flowers, this precision is a game-changer. Most flowering plants are sensitive to nutrient imbalances — too much nitrogen and you get lush foliage but no blooms; too little phosphorus and flowers stay small and pale. In soil, fixing these imbalances takes weeks. In a hydroponic system, you can adjust the nutrient solution and see a response within days.
The Core Advantage: Environment Control
Hydroponic systems give you control over four key variables that dictate flower quality: nutrients, water, light, and temperature. Soil gardeners are always negotiating with nature. Hydroponic growers set the terms. This is why commercial cut flower operations — particularly those supplying roses to the US market — have almost universally shifted to hydroponic growing. The Netherlands, which supplies roughly 40% of global cut flowers, grows the vast majority of its exports hydroponically.
For home growers, that same technology is now accessible at beginner-friendly price points, with starter systems available for as little as $60–$150.
Choosing the Right Hydroponic System for Flowers
Not all hydroponic systems are equal when it comes to flowering plants. Flowers have different root structures, space requirements, and growth cycles than vegetables, so system selection matters more than most beginner guides acknowledge.
Deep Water Culture (DWC)
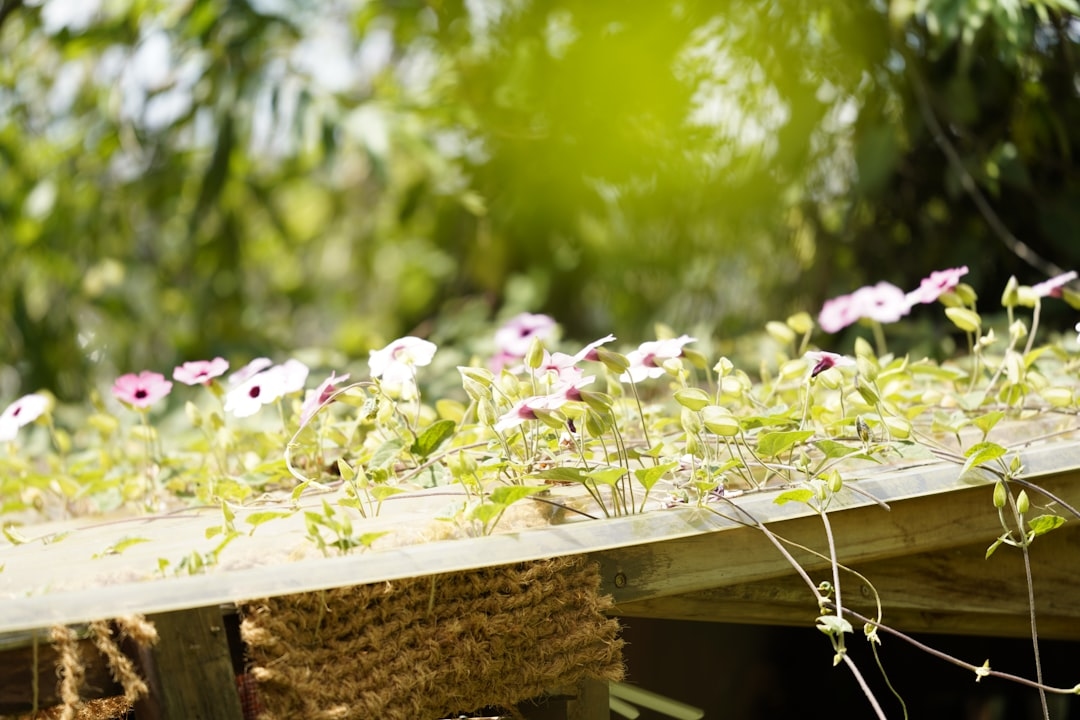
Deep Water Culture is the most beginner-friendly system and works exceptionally well for flowers like sunflowers, zinnias, and marigolds. Plants sit in net pots suspended over a reservoir of oxygenated nutrient solution. An air pump keeps the water oxygenated around the clock.
A basic 5-gallon DWC bucket can support one large flowering plant or two to three smaller ones. Total startup cost runs $60–$100 for a single-bucket setup. The main limitation is scale — each plant typically needs its own reservoir, which means more equipment as you expand.
Nutrient Film Technique (NFT)
NFT systems run a thin, continuous film of nutrient solution through angled channels, with plant roots dangling in the stream. This system excels for flowers with shallower root systems — think snapdragons, gerbera daisies, and strawflowers. Commercial rose growers often use NFT for its efficiency and ease of maintenance.
A four-channel NFT kit typically costs $120–$200 and can support eight to twelve plants simultaneously. The learning curve is slightly steeper than DWC, mostly around maintaining proper channel slope (aim for a 1:30 to 1:40 gradient).
Kratky Method
The Kratky method is passive hydroponics — no pumps, no electricity, no moving parts. You fill a container with nutrient solution, set your plant in a net pot above it, and let the plant drink while an air gap forms naturally beneath the roots. It’s the lowest-cost entry point ($20–$40 for a basic setup) and surprisingly effective for smaller flowering plants like lavender, pansies, and violas.
The trade-off is monitoring. Without active oxygenation, water quality can degrade faster, and you’ll need to check nutrient levels every three to five days.
Ebb and Flow (Flood and Drain)
Ebb and flow systems periodically flood a growing tray with nutrient solution, then drain it back to a reservoir. This mimics natural wet-dry cycles and is particularly well-suited for bulb flowers like tulips, freesia, and ranunculus. Flood intervals can be timed to match each plant’s specific moisture preferences — typically two to four flood cycles per day for most flowering species.
💡 What the Pros Know
Commercial hydroponic flower growers almost universally run separate nutrient formulas for the vegetative and flowering stages — a high-nitrogen “grow” formula early on, then a low-nitrogen, high-phosphorus “bloom” formula once buds appear. Most beginners use a single all-purpose formula and wonder why their flowers are underwhelming. Switching formulas at the right time can increase bloom size by 20–40% and dramatically deepen petal color. Products like General Hydroponics Flora Series or Botanicare Pure Blend Pro are specifically designed for this two-stage approach and are widely available at US garden centers for $20–$35 per bottle.
Best Flowers to Grow Hydroponically as a Beginner
Flower selection is where many beginners go wrong. Not every flower thrives in hydroponic conditions right away — some have complex dormancy requirements, others need specific pH ranges that shift mid-season. Starting with forgiving, fast-blooming species builds your confidence and your technique simultaneously.
Top Beginner-Friendly Hydroponic Flowers
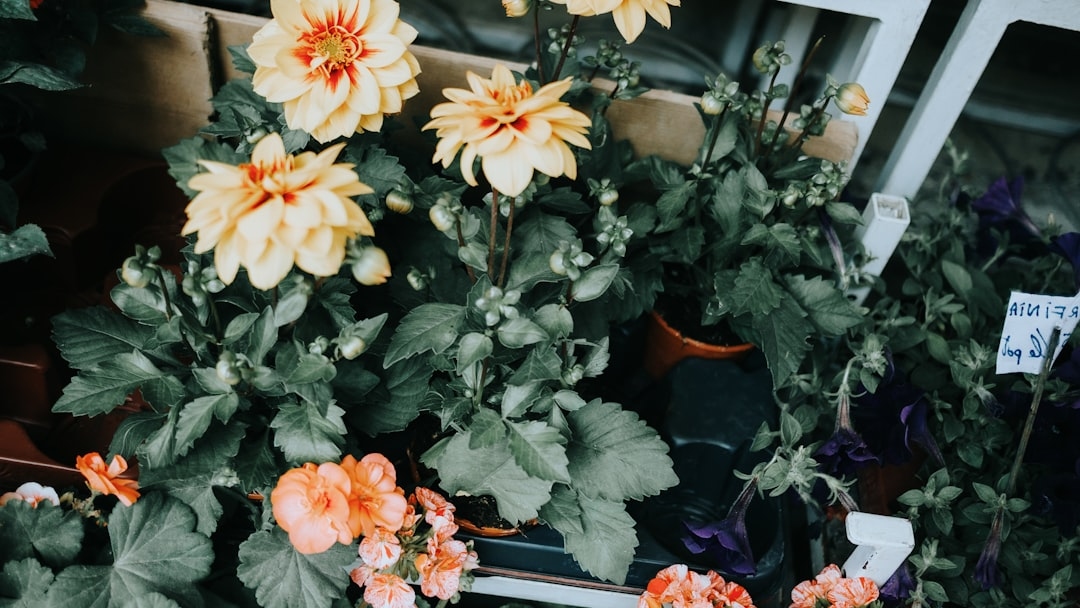
- Zinnias: Fast-growing, pest-resistant, and available in every color imaginable. Zinnias go from seed to bloom in 45–60 days hydroponically and tolerate pH swings between 5.5 and 6.5 without complaint. Ideal for DWC or NFT systems.
- Marigolds: Practically bulletproof. Marigolds thrive in nutrient solution at an EC (electrical conductivity) of 1.6–2.2 mS/cm and bloom prolifically with minimal intervention. They also naturally deter fungus gnats — a common hydroponic pest.
- Snapdragons: One of the most rewarding hydroponic flowers. Snapdragons grow quickly in NFT systems and produce long, elegant stems that rival anything you’d find in a florist’s cooler. They prefer cooler temperatures (55–65°F) and slightly acidic water (pH 5.5–6.0).
- Gerbera Daisies: A favorite in the cut flower industry and surprisingly manageable for home growers. Gerberas need strong light (at least 14 hours under grow lights for optimal blooming) and a phosphorus-rich nutrient formula. Their vase life can reach 14 days when grown hydroponically — significantly longer than soil-grown specimens.
- Pansies and Violas: Perfect for the Kratky method. These compact, cold-tolerant flowers bloom reliably in systems with low EC levels (0.8–1.4 mS/cm) and are an ideal starter species for anyone new to hydroponic growing.
- Lavender: Slightly more advanced but deeply rewarding. Lavender grown hydroponically produces fragrant, harvestable blooms in about 90 days from a rooted cutting. It prefers a pH of 6.0–7.0 and lower nutrient concentrations than most flowering plants.
Flowers to Avoid Initially
Roses, while the crown jewel of the hydroponic flower industry, require precise EC management (2.0–3.5 mS/cm depending on the growth stage), specific temperature stratification, and considerable pruning knowledge. They’re not impossible for beginners, but they’re unforgiving of mistakes. Similarly, orchids have highly specific mounting requirements and don’t adapt well to most standard hydroponic systems without significant modification. Give yourself one full growing cycle with easier species before attempting either.
Setting Up Your First Hydroponic Flower System
The setup process is straightforward once you have the right equipment. Here’s a practical walkthrough for a beginner DWC system — the most common starting point for new hydroponic flower growers.
Equipment You’ll Need
- 5-gallon opaque bucket with lid (opaque prevents algae growth)
- 2-inch or 3-inch net pots
- Air pump, air stone, and tubing
- Growing medium: hydroton clay pebbles or rockwool cubes
- pH meter and pH adjustment solutions (pH Up and pH Down)
- EC/TDS meter
- Hydroponic nutrient solution (two-part or three-part formula)
- Full-spectrum LED grow light (minimum 30–50 watts per square foot for flowering plants)
Step-by-Step Setup
- Prepare your reservoir. Fill your 5-gallon bucket with pH-adjusted water (target: 5.8–6.2 for most flowering plants). Use reverse osmosis or filtered water when possible — tap water in many US cities contains chlorine and fluoride levels that can stress plants over time.
- Mix your nutrients. Follow the manufacturer’s dilution rates precisely for the first few batches. For a flowering plant in the vegetative stage, target an EC of 1.2–1.8 mS/cm. Increase to 1.8–2.4 mS/cm once buds appear.
- Set up your air system. Connect the air pump to the air stone via tubing, place the air stone at the bottom of the reservoir, and confirm it’s producing a steady stream of bubbles.
- Prepare your seedlings. Start seeds in dampened rockwool cubes. Keep them in a warm (70–75°F), humid environment until roots emerge from the bottom of the cube — typically seven to fourteen days.
- Transfer to the system. Place the rockwool cube inside a net pot filled with rinsed clay pebbles. Set the net pot in the bucket lid. The bottom of the cube should just touch or sit slightly above the nutrient solution surface.
- Position your light. For seedlings, hang the grow light 18–24 inches above the canopy. As plants mature and flowering begins, you can lower it to 12–18 inches for denser bud development.
pH and EC: The Two Numbers That Run Everything
New growers often underestimate how critical pH management is. A pH outside the 5.5–6.5 range doesn’t just slow growth — it locks out specific nutrients entirely, causing deficiency symptoms even when those nutrients are present in the solution. Check pH daily for the first two weeks until you understand how quickly your system drifts. Most systems drift upward (pH rises) as plants consume nutrients.
EC tells you how nutrient-dense your solution is. Think of it as a salinity reading — higher EC means more dissolved nutrients. Check EC every two to three days and top up with plain pH-adjusted water (not fresh nutrient solution) when levels rise due to evaporation.
Lighting for Hydroponic Flowers: What Actually Works
Light is the single most important input for flowering plants, and it’s where beginner setups most commonly fall short. Flowers need both the right intensity and the right spectrum to bloom properly.
Light Intensity and Spectrum
For flowering plants, aim for a light intensity of 400–600 μmol/m²/s (PPFD) during the vegetative stage, increasing to 600–900 μmol/m²/s once flowering begins. Full-spectrum LEDs in the 3000K–4000K color temperature range work well across both stages. Many modern LEDs include a dedicated “bloom” switch that boosts red spectrum output — use it once buds appear.
A quality LED panel capable of supporting a 2×2-foot flowering canopy runs $80–$200 from brands like Spider Farmer, Mars Hydro, or Vivosun — all widely available through US retailers like Amazon and Home Depot.
Photoperiod: Triggering Bloom with Light Schedules
Many flowering plants are photoperiod-sensitive — meaning the ratio of light to darkness signals them to shift from vegetative growth to flowering. Most annual flowers (zinnias, marigolds, snapdragons) are day-neutral and will bloom regardless of light schedule once mature. But others, including many perennials and specialty cut flowers, require a shift to a 12-hour light/12-hour dark cycle to trigger blooming.
Use a programmable outlet timer ($15–$25) to automate your light schedule. Set it and forget it — consistency matters more than perfection here.
Nutrients, Water Quality, and Feeding Schedules
Hydroponic nutrients come in several formats: liquid concentrates (most common for beginners), dry salts (most cost-effective for larger operations), and pre-mixed all-in-one formulas. For flowers specifically, look for nutrients with a higher phosphorus (P) and potassium (K) content relative to nitrogen (N) — the NPK ratios on bloom formulas typically look like 5-50-17 or similar.
The Two-Stage Feeding Approach
Stage 1 (Vegetative, weeks 1–4): Use a balanced grow formula. Target EC 1.2–1.8 mS/cm. This stage builds strong stems and leaf structure that will support heavy blooms later.
Stage 2 (Flowering, weeks 4 onward): Switch to a bloom formula with reduced nitrogen and elevated phosphorus. Target EC 1.8–2.4 mS/cm. Adding a bloom booster like liquid kelp or a silica supplement at this stage strengthens cell walls and increases stem rigidity — particularly valuable for cut flowers that need to hold up in a vase.
Water Temperature and Reservoir Maintenance
Keep reservoir water between 65–72°F. Warmer water holds less dissolved oxygen and creates ideal conditions for pythium (root rot) — one of the most common and destructive hydroponic diseases. Change your nutrient solution completely every seven to fourteen days, and rinse the reservoir walls with a dilute hydrogen peroxide solution (3%, 1 part to 10 parts water) to prevent biofilm buildup.
A Seasonal Timeline for Hydroponic Flower Growing
One of hydroponics’ greatest advantages is the ability to grow year-round indoors, independent of outdoor seasons. That said, aligning your growing calendar with natural bloom cycles — or intentionally counter-programming against them — can make your efforts even more rewarding.
- January–February (Winter Start): Start slow-growing species that need a long lead time: lavender from cuttings, snapdragons, and gerbera daisies. These will reach peak bloom by April–May, just as outdoor gardening season begins for most of the US.
- March–April (Spring Ramp-Up): Start fast-growing annuals like zinnias and marigolds. With grow lights providing 14–16 hours of light daily, these species can go from seed to first bloom in 45–55 days — meaning early May blooms, weeks ahead of outdoor plantings.
- May–June (Peak Season Alignment): If you’re growing cut flowers for personal use or gifts, this is prime time. Gerberas, snapdragons, and lavender harvested in late spring have exceptional shelf life. Consider timing a large batch for graduation season, Mother’s Day (second Sunday in May), or Memorial Day.
- July–August (Summer Heat Management): Indoor temperature management becomes critical. If your grow space exceeds 80°F, invest in a small clip fan and consider a water chiller for your reservoir. Snapdragons and lavender will struggle in the heat; switch to heat-tolerant zinnias and marigolds.
- September–October (Fall Planning): Start cool-season flowers: pansies, violas, and stock. These species actually perform better in cooler grow environments (55–65°F) — a natural advantage as home temperatures drop in autumn.
- November–December (Holiday Growing): Amaryllis and paperwhite narcissus can be forced in modified hydroponic setups with stunning results. Both species are traditionally grown in shallow water trays and adapt easily to a Kratky-style setup. Timed correctly, they’ll bloom for Thanksgiving or Christmas.
Regional Considerations: How Location Shapes Your Setup
Hydroponics is often marketed as location-independent — and while that’s largely true, regional factors still influence your setup decisions in meaningful ways.
Northeast (USDA Zones 4–6)
Long, cold winters make indoor hydroponic growing especially valuable in New England, New York, and the mid-Atlantic states. Grow room insulation matters here — an unheated basement or garage can drop below 50°F in January, stressing roots and slowing growth significantly. Budget for a small space heater ($30–$60) and keep your grow area above 60°F at all times. On the upside, naturally cool indoor temperatures are ideal for snapdragons and pansies, which produce their best blooms in the 55–65°F range.
Southeast and Gulf Coast (USDA Zones 7–10)
Growers in Florida, Georgia, Texas, and the Gulf states face the opposite challenge: keeping systems cool in summer. Reservoir temperatures above 75°F dramatically increase pythium risk. A reservoir water chiller ($80–$150) is close to essential for summer growing in these regions, and scheduling intense growing activity in the fall and winter months (October through March) takes advantage of naturally cooler ambient temperatures.
West Coast (USDA Zones 8–11)
The mild, stable climate of coastal California, Oregon, and Washington is arguably the most forgiving environment for indoor hydroponic growing year-round. Temperature swings are minimal, humidity is manageable, and the extended natural daylight hours in summer can supplement artificial lighting significantly. California growers in particular benefit from easy access to high-quality hydroponic supply shops and a strong local community of experienced growers — resources that are harder to find in less densely populated regions.
Mountain West and Plains (USDA Zones 4–7)
Altitude affects atmospheric pressure and CO₂ density in ways that can subtly influence plant respiration, though this is rarely a practical concern for home growers below 8,000 feet. The more significant factor is low humidity — states like Colorado, Utah, and Wyoming often drop below 20% relative humidity in winter, which can cause transpiration stress in leafy plants. Aim to maintain 50–70% RH in your grow space with a small humidifier.
Common Problems and How to Fix Them
Even well-designed hydroponic systems run into problems. The good news: most issues follow predictable patterns and have clear solutions.
Yellowing Leaves
Yellow leaves are almost always a nutrient issue, but the pattern tells you which one. Yellowing that starts at the bottom of the plant and moves upward signals nitrogen deficiency — increase your EC slightly or switch to a higher-nitrogen formula. Yellowing between leaf veins (with veins staying green) indicates iron or manganese deficiency, usually caused by pH drifting above 6.5, which locks out these micronutrients. Correct pH first before adding more nutrients.
Root Rot (Pythium)
Healthy hydroponic roots are white and firm. Brown, slimy, foul-smelling roots indicate pythium — a water mold that thrives in warm, poorly oxygenated conditions. Act immediately: remove affected roots with sterilized scissors, lower reservoir temperature to below 68°F, increase aeration, and treat with a dilute hydrogen peroxide solution (1 ml of 35% food-grade H₂O₂ per gallon of water) or a pythium-specific biological treatment like Hydroguard.
Algae Growth
Green slime on reservoir walls and tubing means light is penetrating your system. Cover all water surfaces and containers completely — even small gaps are enough for algae to establish. Algae itself won’t kill plants directly, but it competes for oxygen and nutrients, and creates conditions that favor root pathogens. Prevention through light exclusion is far easier than remediation.
Stunted or No Flowering
If your plant is growing well but not blooming, the culprit is usually one of three things: insufficient light intensity (increase PPFD), incorrect light schedule (verify photoperiod for your specific species), or excessive nitrogen in the nutrient solution (which promotes vegetative growth at the expense of flowering). Switch to a bloom formula and confirm you’re meeting the plant’s minimum light requirements.
Scaling Up: From One Plant to a Productive Home Setup
Once you’ve completed your first successful grow cycle, the natural instinct is to expand — and hydroponic systems scale elegantly. A 4×4-foot grow tent (around $100–$150) with a quality 400–600W LED panel and a multi-site NFT or ebb-and-flow system can support 12–20 flowering plants simultaneously. At that scale, you’re producing enough cut flowers to supply your household year-round and have plenty left over to share.
For those interested in selling flowers locally, check your state’s cottage industry regulations. Many states — including California, Texas, and New York — allow home growers to sell directly at farmers markets or through community-supported agriculture (CSA) arrangements without a commercial license, provided annual revenue stays below a specified threshold (typically $5,000–$25,000 depending on the state).
Frequently Asked Questions: Hydroponic Flower Growing for Beginners
What is the easiest flower to grow hydroponically for a beginner?
Zinnias and marigolds are the most beginner-friendly hydroponic flowers. Both tolerate minor nutrient and pH fluctuations, grow quickly (first blooms in 45–60 days), and thrive in basic DWC or NFT systems. Pansies and violas are equally easy in passive Kratky setups.
How much does it cost to start a hydroponic flower garden?
A functional beginner setup — DWC bucket, air pump, grow light, nutrients, and pH meter — runs $120–$250 total. Ongoing costs are primarily nutrients (approximately $15–$30 per month for a small system) and electricity for the grow light (roughly $10–$25/month depending on wattage and local rates).
Do hydroponic flowers smell and look the same as soil-grown flowers?
Yes, and often more intensely so. Hydroponic conditions allow precise control over nutrient inputs that influence fragrance compound production. Lavender and snapdragons grown hydroponically with appropriate potassium levels frequently produce stronger fragrance than their soil-grown counterparts. Color saturation is also typically deeper due to optimized nutrition.
Can you grow hydroponic flowers without a grow light?
In theory, yes — if your growing area receives at least six to eight hours of direct sunlight daily from a south-facing window. In practice, most indoor locations in the US don’t provide adequate light intensity for flowering plants, particularly in fall and winter. A modest LED grow light ($60–$100) will reliably outperform window light in nearly every scenario and dramatically improve bloom quality.
How often do you change the water in a hydroponic flower system?
Complete reservoir changes every seven to fourteen days are standard practice. Between changes, top off with plain pH-adjusted water (not fresh nutrient solution) as levels drop from plant uptake and evaporation. Always check pH and EC before and after any additions to the reservoir.
Your First Harvest and What Comes Next
The first time you cut a stem you grew entirely in water, under lights, from a seed you planted yourself — it’s a genuinely different feeling from picking up a grocery store bouquet. You know exactly what went into it. No pesticides, no supply chain, no guesswork.
That first harvest also teaches you things no guide can fully convey: how your specific system behaves, which flowers respond best to your water source, how your grow space handles temperature and humidity. It calibrates your instincts in a way that makes every subsequent cycle easier and more productive.
Keep a simple grow journal — even just a notes app on your phone — logging pH, EC, any problems you noticed, and what you changed. After two or three cycles, patterns emerge that are specific to your setup. That personalized knowledge compounds quickly.
Start with one system, one species, one cycle. Master the fundamentals of this hydroponic flowers beginner’s journey, and you’ll have everything you need to scale to whatever you want to grow next — whether that’s a windowsill full of gerberas or a garage operation supplying your local farmers market. The water is ready. The only thing missing is your first seed.
+ There are no comments
Add yours