Contents:
- What Is Mulch and Why Do Flower Gardens Need It?
- The Difference Between Organic and Inorganic Mulch
- Choosing the Best Mulch for Flower Gardens
- Shredded Hardwood Bark
- Cedar or Cypress Mulch
- Pine Straw (Pine Needle Mulch)
- Compost
- Straw
- Cocoa Shell Mulch
- Mulch Cost Breakdown and Budget Planning
- How Deep Should You Mulch Flower Gardens?
- The “Mulch Volcano” Problem
- A Seasonal Mulching Calendar for Flower Gardens
- Spring (March–May)
- Summer (June–August)
- Fall (September–November)
- Winter (December–February)
- Step-by-Step: How to Mulch a Flower Garden the Right Way
- Tools You’ll Need
- Common Mulching Mistakes Beginners Make
- Mulching for Specific Types of Flowers
- Perennials (Coneflowers, Black-Eyed Susans, Daylilies, Hostas)
- Annual Flowers (Zinnias, Marigolds, Impatiens, Petunias)
- Bulbs (Tulips, Daffodils, Dahlias, Alliums)
- Roses
- Native Wildflowers
- Mulching and Soil Health: The Long Game
- Mulching Flower Gardens Guide: Environmental and Water-Saving Benefits
- Frequently Asked Questions About Mulching Flower Gardens
- How often should you replace mulch in flower gardens?
- What mulch is best for flower beds?
- Can you put too much mulch on flower beds?
- Does mulch attract pests or bugs?
- Should you mulch flower gardens in fall or spring?
- Ready to Transform Your Flower Garden This Season?
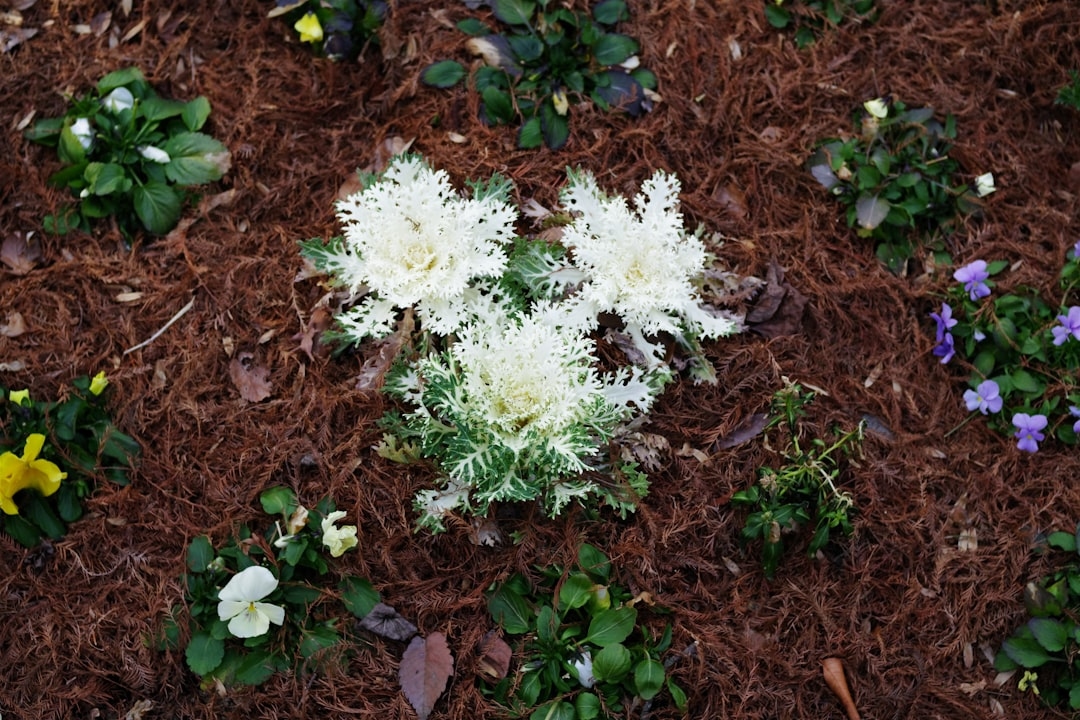
Picture this: it’s a warm June morning, and you’re kneeling beside a garden bed bursting with dahlias, black-eyed Susans, and purple coneflowers. The soil beneath your fingertips feels cool and damp, even though it hasn’t rained in five days. A thick, fragrant layer of cedar mulch cushions your knees. The weeds? Almost nonexistent. This is what a well-mulched flower garden feels like — and once you experience it, you’ll never go back to bare soil again.
Mulching is one of the single most impactful things you can do for your flower garden. It costs relatively little, takes an afternoon to apply, and pays dividends all season long. This mulching flower gardens guide will walk you through everything — from choosing the right material to applying it correctly — so you can protect your blooms, save time on maintenance, and grow flowers that truly thrive.
What Is Mulch and Why Do Flower Gardens Need It?
Mulch is any material spread over the surface of garden soil. It acts as a protective blanket, shielding roots from temperature swings, locking in moisture, suppressing weeds, and — in the case of organic mulches — gradually feeding the soil as it breaks down.
Bare soil is actually quite vulnerable. Without a protective layer, summer sun can raise soil temperatures to over 130°F at the surface, stressing or outright killing shallow plant roots. Rain hits unprotected soil and causes compaction and erosion. Weed seeds land freely and germinate quickly. All of that is working against your flowers before they’ve even had a chance to bloom.
A 2–3 inch layer of organic mulch can reduce soil moisture evaporation by up to 70%, according to research from the University of California Cooperative Extension. That means less watering, less stress on your plants, and fewer wilted blooms on hot summer afternoons.
The Difference Between Organic and Inorganic Mulch
Organic mulches — shredded bark, wood chips, straw, compost, pine needles, and grass clippings — break down over time and improve your soil’s structure and fertility. They’re the go-to choice for most flower gardeners because they do double duty: protect now, enrich later.
Inorganic mulches — gravel, landscape fabric, rubber chips — don’t decompose, so they offer long-term weed suppression and moisture retention without needing annual replacement. However, they don’t improve soil health, and some (like rubber) can leach chemicals over time. For ornamental flower beds where beauty and soil quality matter, organic options almost always win.
Choosing the Best Mulch for Flower Gardens
Not all mulches are created equal. The best choice depends on your flower types, your soil, your climate, and honestly, your aesthetic preferences. Here’s a breakdown of the most popular options for flower gardens specifically.
Shredded Hardwood Bark
This is the most widely available and versatile mulch for flower beds. It has a clean, polished look that complements colorful blooms without competing visually. Shredded hardwood breaks down in 1–2 years, steadily enriching the soil with organic matter. It’s widely available at garden centers and big-box stores for roughly $4–$7 per 2-cubic-foot bag, or $25–$45 per cubic yard in bulk.
Cedar or Cypress Mulch
Cedar and cypress mulches are naturally aromatic and contain oils that repel certain insects, including some mosquitoes and gnats — a nice bonus for a garden you’re spending time in. They break down more slowly than hardwood, lasting 2–3 years. Expect to pay slightly more: around $5–$9 per bag at retail.
Pine Straw (Pine Needle Mulch)
Pine straw is the mulch of choice across the American Southeast and works beautifully around acid-loving flowers like azaleas, gardenias, and rhododendrons. It knits together into a mat that resists blowing in the wind and allows excellent water penetration. A bale covering roughly 35–40 square feet costs $5–$8. It does acidify soil slightly over time, so check your soil pH before committing to it around plants that prefer neutral conditions.
Compost
Finished compost used as mulch is like giving your garden a slow-release fertilizer and a protective blanket at the same time. It’s the most nutrient-rich option and improves soil structure faster than any other mulch. The downside: it doesn’t suppress weeds as effectively unless applied in a full 3-inch layer, and it looks less “finished” than bark. Bagged compost runs $5–$8 per 1-cubic-foot bag, though making your own is essentially free.
Straw
Straw (not hay — hay contains weed seeds) is an affordable, lightweight option that works especially well as a winter mulch for protecting perennials. It’s loose and insulating, but it can look untidy in formal garden designs and tends to blow around. A large bale covering 500+ square feet costs $8–$15 at feed stores.
Cocoa Shell Mulch
For the garden that needs to smell amazing, cocoa shell mulch delivers a rich chocolate scent for the first few weeks after application. It forms a light crust on top that resists blowing. It’s one of the more expensive options at $8–$12 per bag, and it’s worth noting: cocoa is toxic to dogs, so skip this one if your pups roam the garden beds.
Mulch Cost Breakdown and Budget Planning
One of the most common questions beginners ask is: how much is this going to cost me? The honest answer is — not much, especially compared to the time and money it saves you in watering and weeding. Here’s a realistic budget breakdown for a 100-square-foot flower bed, which is a fairly typical size for a front yard border.
- Bagged shredded hardwood mulch (budget): ~$30–$45 for 6–8 bags (enough for a 2–3 inch layer)
- Bulk hardwood mulch delivered: ~$35–$60 per cubic yard (one cubic yard covers ~100 sq ft at 3 inches deep)
- Cedar or cypress mulch (mid-range): ~$45–$65 bagged for the same area
- Premium cocoa shell or colored mulch: ~$70–$100 bagged for 100 sq ft
- Pine straw (Southeast/budget option): ~$15–$25 for 3–4 bales
For most beginners with a modest flower bed, plan on spending $30–$60 per season for initial mulching. After the first year, you’ll typically only need to top-dress with 1 inch of fresh mulch annually, cutting your cost roughly in half going forward. Buying in bulk always delivers better value — a cubic yard of mulch at $40 beats the equivalent in bags at $60+.
How Deep Should You Mulch Flower Gardens?
Depth is where beginners most commonly go wrong — and going wrong in either direction causes real problems.
Too shallow (less than 1 inch): Weeds push right through, moisture evaporates quickly, and you’ve wasted your money and effort.
Too deep (more than 4 inches): Soil stays waterlogged, roots can’t breathe, and you invite fungal disease and rot. This is especially damaging for bulbs and shallow-rooted perennials.
The sweet spot for most flower gardens is 2–3 inches of organic mulch. Around perennials with woody crowns (like lavender or salvia), stay closer to 2 inches and keep mulch pulled back an inch from the crown itself. Around annuals and bulbs, 2 inches is plenty. In vegetable-style cutting gardens with dense plantings, even 1.5 inches can be sufficient if you’re refreshing annually.
The “Mulch Volcano” Problem
You’ve probably seen this: mulch piled up like a volcano against the base of a tree or shrub. It looks intentional but it’s actually harmful. Mulch piled against plant stems creates a moist, dark environment that invites rot, fungal disease, and pest damage. Always leave a 2–3 inch gap between your mulch and any plant stem or crown. Think of it as a donut, not a volcano.
A Seasonal Mulching Calendar for Flower Gardens
Timing matters. Apply mulch at the wrong time and you can actually work against your garden. Here’s a straightforward seasonal timeline to follow across most of the continental US.
Spring (March–May)
This is the primary mulching season. Wait until the soil has warmed to at least 50°F before applying spring mulch — in most of the country, that’s mid-April in USDA Zones 5–6, and late March in Zones 7–8. Applying mulch too early traps cold soil and delays growth. Once the soil is warm and your perennials have started to emerge (you can see the tips), apply a fresh 2–3 inch layer. This protects roots through late frosts, conserves moisture as temperatures rise, and suppresses the first wave of spring weeds.
Summer (June–August)
Check your mulch layer in early June. If it’s broken down to less than 1.5 inches, top-dress with another inch. Summer is when mulch earns its keep hardest — it’s your primary defense against heat stress and drought. In Zones 8–10 (Texas, Florida, Southern California), consider a slightly thicker 3-inch layer to combat intense heat.
Fall (September–November)
After your first hard frost, apply a fresh layer of mulch — or add a thicker winter mulch of 3–4 inches of straw or shredded leaves — over perennial beds to insulate roots through winter. This is especially important in Zones 4–6 where freeze-thaw cycles can heave plant roots out of the ground. Mark your perennial locations with small stakes before mulching so you don’t accidentally damage them when removing mulch in spring.
Winter (December–February)
In Zones 7 and warmer, a 2-inch layer of mulch is sufficient year-round. In colder zones, your winter mulch layer is doing protective work right now. Leave it in place until soil temperatures start to rise in late winter — usually February in Zone 7, March in Zone 5. Remove heavy straw mulch gradually as plants begin to emerge, rather than all at once.
Step-by-Step: How to Mulch a Flower Garden the Right Way
This is the practical part. Follow these steps your first time and you’ll be set up for a great growing season.
- Clear the bed first. Pull existing weeds by the root — don’t just snap them off at the surface. Mulch slows new weeds but won’t kill established ones. This step takes the most time, but it pays off significantly.
- Edge the bed. Use a spade or half-moon edger to create a clean 3–4 inch deep edge around the perimeter. This keeps mulch from spilling onto the lawn and creates a defined border that makes the whole garden look intentional.
- Water the soil if it’s dry. Mulch is much more effective at retaining moisture when applied to already-moist soil. If your beds are dry, give them a thorough soak the day before mulching.
- Apply mulch evenly. Dump or spread mulch in small piles across the bed, then use a rake or your gloved hands to spread it to an even 2–3 inch depth. A bow rake works beautifully for this.
- Pull mulch away from plant stems. Leave that 2–3 inch gap around every stem and crown. Be especially careful around bulbs, which can rot quickly if crowded with damp organic material.
- Water lightly after applying. A light watering helps settle the mulch and begins any initial breakdown. It also activates beneficial soil microbes that will start processing the organic material.
Tools You’ll Need
- Garden gloves (mulch can irritate skin after extended contact)
- Wheelbarrow or garden cart for moving bulk mulch
- Bow rake for spreading
- Half-moon edger or flat spade for clean edges
- Garden trowel for working around delicate plants
Common Mulching Mistakes Beginners Make
There’s a reader story that comes up again and again in gardening communities — a first-time gardener, so excited about their new flower bed, piles on a generous 5 or 6 inches of fresh wood chip mulch straight from the chipper. The plants look great for two weeks. Then the stems start to yellow. By midsummer, half the perennials have crown rot. What happened? Too much mulch, applied too close to the stems, with fresh (not aged) wood chips that temporarily robbed nitrogen from the soil as they decomposed. It’s a heartbreaking but incredibly common first-year mistake — and completely avoidable.
Here are the mistakes to watch out for:
- Using fresh wood chips directly from a chipper. Fresh chips are high in carbon and can temporarily tie up soil nitrogen during decomposition, starving your flowers. Age them in a pile for 6–12 months first, or buy commercially composted wood mulch.
- Mulching dry soil. Mulch locks in whatever moisture is already there. Applying it to dry, cracked soil just preserves the drought.
- Skipping the weeding step. This is the most common shortcut and the most costly. Established weeds simply grow up through mulch.
- Applying mulch over landscape fabric in flower beds. Landscape fabric under mulch in flower beds is a 5-year plan for frustration. It degrades, shreds, and surfaces through the mulch layer, and it prevents the beneficial soil improvement that organic mulch is supposed to provide. Skip the fabric in flower beds — it’s better suited for paths and hardscape borders.
- Not refreshing mulch annually. Organic mulch breaks down — that’s the point. But a depleted 0.5-inch layer isn’t protecting anything. Top-dress each spring.
Mulching for Specific Types of Flowers
Different flowers have different needs. A one-size-fits-all approach works reasonably well, but understanding these nuances takes your results to the next level.
Perennials (Coneflowers, Black-Eyed Susans, Daylilies, Hostas)
Perennials benefit enormously from mulch because they’re in the same spot year after year — and year-over-year mulch breakdown dramatically improves soil quality. Apply 2–3 inches in spring, pull back from the crown, and top-dress in fall with a winter protection layer. Many perennials self-seed (coneflowers especially), so apply mulch after seeds have had a chance to germinate in late spring if you want natural spreading.
Annual Flowers (Zinnias, Marigolds, Impatiens, Petunias)
Annuals have shallower roots and faster growth cycles than perennials, so a lighter touch works fine — 1.5 to 2 inches is plenty. Since you’ll be replanting each year anyway, fine-textured mulches like shredded compost or finely ground bark work especially well around annuals because they’re easy to work into the soil at the end of the season.
Bulbs (Tulips, Daffodils, Dahlias, Alliums)
Mulching over bulb plantings requires particular care. After fall planting, apply 2–3 inches of mulch to insulate over winter. In spring, as shoots emerge, pull mulch gently back so shoots can push through easily — don’t remove it entirely, just give those emerging tips room. Once plants are 4–6 inches tall, nestle the mulch back around (but not against) the stems.
Roses
Roses are heavy feeders and love moisture retention, making them excellent mulch candidates. Apply 3 inches of aged wood chip or shredded bark mulch, keeping it 4–6 inches away from the canes to prevent disease. Many rose growers add a thin layer of compost directly against the soil before adding bark mulch on top — this double layer is sometimes called a “compost sandwich” and provides exceptional fertility benefits throughout the growing season.
Native Wildflowers
Here’s a nuance that surprises beginners: many native wildflowers — particularly prairie natives like coneflowers, wild bergamot, and prairie dropseed — actually prefer leaner, less-amended soils. Heavy mulching can make soil too rich and moist for plants that evolved in open, well-drained conditions. For native wildflower beds, apply a thin layer of gravel mulch or just 1–1.5 inches of shredded leaves rather than thick bark. Let the plant community breathe.
Mulching and Soil Health: The Long Game
The most exciting thing about organic mulching isn’t what it does in year one — it’s what it does over years two, three, four, and beyond. Each season’s mulch layer breaks down into humus, the rich, dark, sweet-smelling component of healthy soil that retains water, feeds microorganisms, and creates the kind of structure where plant roots penetrate deeply and easily.
A University of Minnesota Extension study found that perennial beds mulched consistently with 2–3 inches of organic mulch over five years showed a 40% increase in organic matter in the top 6 inches of soil compared to unmulched control beds. More organic matter means better water-holding capacity, more earthworm activity, and healthier, more disease-resistant plants over time.
This is why experienced gardeners talk about building their soil like a long-term investment. You’re not just growing flowers — you’re growing the garden ecosystem that makes everything easier and more beautiful year after year.
Mulching Flower Gardens Guide: Environmental and Water-Saving Benefits
There’s a genuinely satisfying environmental dimension to mulching that doesn’t get discussed enough. A mulched flower garden uses significantly less water — up to 50% less irrigation in some climates — which matters both for your water bill and for broader conservation. With water restrictions increasingly common across the American West and Southwest, mulching isn’t just good gardening; in many communities, it’s responsible citizenship.
Organic mulch also sequesters carbon as it breaks down into soil organic matter, supports soil biodiversity including fungi, bacteria, and beneficial insects, and reduces stormwater runoff by improving soil water absorption. Your flower garden becomes a small, beautiful, ecologically active patch of the planet.
Frequently Asked Questions About Mulching Flower Gardens
How often should you replace mulch in flower gardens?
Organic mulch should be refreshed once per year, typically each spring. Rather than removing old mulch, simply top-dress with 1 inch of fresh material. Over time, the decomposed layers beneath become valuable organic matter. Only remove old mulch if it has developed a crusty, water-repellent layer (called hydrophobic mulch) or shows signs of fungal disease.
What mulch is best for flower beds?
Shredded hardwood bark is the best all-around mulch for most flower gardens — it’s affordable, widely available, breaks down slowly enough to last a full season, and improves soil as it decomposes. Cedar mulch is ideal if you want insect-repelling properties. Pine straw is the best choice for acid-loving flowers like azaleas and rhododendrons. Compost is the most soil-enriching option but requires a thicker layer for weed suppression.
Can you put too much mulch on flower beds?
Yes. More than 4 inches of mulch in a flower bed can suffocate roots, prevent oxygen exchange, cause waterlogging, and promote fungal disease. The ideal depth for flower garden mulch is 2–3 inches. Always keep mulch pulled back 2–3 inches from plant stems and crowns to prevent rot.
Does mulch attract pests or bugs?
Organic mulch does create habitat for some insects and organisms — most of which are beneficial, including earthworms, ground beetles, and decomposer fungi. Some mulches (particularly thick, damp layers of wood chips) can harbor slugs, millipedes, and occasionally mice. To minimize pest issues, avoid over-mulching, keep mulch pulled away from plant stems, and use cedar or cypress mulch, whose natural oils deter some insects.
Should you mulch flower gardens in fall or spring?
Both seasons serve different purposes. Spring mulching (after soil reaches 50°F) focuses on moisture retention, weed suppression, and temperature moderation during the growing season. Fall mulching (after the first hard frost) provides winter insulation for perennial roots and bulbs. In most of the US, a full spring application plus a fall top-dress is the ideal approach. If you can only mulch once, spring is the higher-impact timing for most flower gardens.
Ready to Transform Your Flower Garden This Season?
A bag of mulch and a free afternoon this April can change how your flower garden performs for the rest of the year. Stronger roots. Fewer weeds. More blooms lasting longer into late summer. Less time watering and more time actually enjoying what you’ve grown.
Start simple: measure your flower bed, calculate the square footage, order or pick up enough mulch for a 2–3 inch layer, and spend a Saturday morning transforming your beds. Take a photo before and after — you’ll want to remember the difference. Then, come fall, add that protective winter layer and watch your perennials return stronger than ever next spring.
The best gardens aren’t built in a single season. They’re built layer by layer, year by year — and that very first layer of mulch you lay down is where the story begins.
+ There are no comments
Add yours